How to Import Your Wallpaper Engine Library to Mac
A step-by-step guide to importing your Wallpaper Engine wallpapers from a Windows PC to your Mac using Vivid Walls and the free companion app. Works over your local network, takes about five minutes.
Wallpaper Engine isn't available on macOS, but you can run your existing library natively on a Mac using Vivid Walls and its free Windows Companion. The Companion scans your Steam library and transfers scenes to your Mac over your local network: no cloud, no account, no video conversion. This guide walks through the full setup. For the rendering internals, see the technical guide. If you were hoping for an official Mac version instead, the developers have answered that directly and we quoted them in is Wallpaper Engine coming to macOS.
What you need before you start
- A Mac running macOS 14 (Sonoma) or later
- A Windows PC with Wallpaper Engine installed and your library set up in Steam
- Both computers on the same local network (home Wi-Fi or Ethernet, either works)
- Vivid Walls installed from the Mac App Store (free, 3-day trial, $9.99 unlocks the full library)
- The Vivid Walls Companion, a free Windows app (download for Windows)
Step by step
Step 1: Install and launch the Companion on your PC
Download the Companion installer and run it. When Windows Firewall prompts you, click Allow access. The Companion needs local network connections to talk to your Mac. Without that permission, the two computers can't find each other.
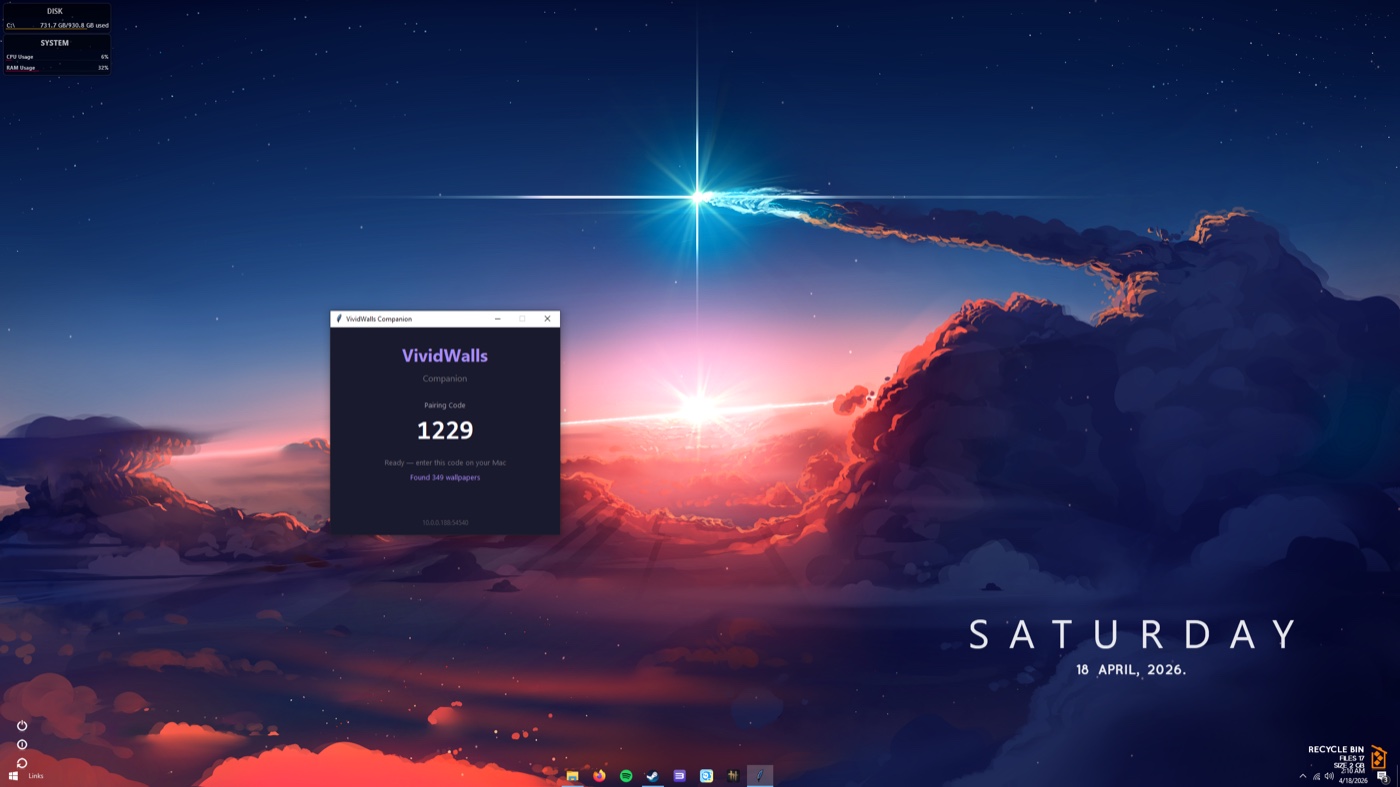
Once the Companion is running, it scans your common Steam library folders automatically. After a few seconds you'll see "Found X wallpapers" and a 4-character pairing code. That code is how your Mac confirms it's connecting to the right machine.
If the count shows zero, your Wallpaper Engine library might be on a non-default drive. Click Browse... and navigate to your wallpaper_engine folder. It's usually at SteamLibrary\steamapps\common\wallpaper_engine. Point it at the right folder and the count updates immediately.
Step 2: Open Vivid Walls on your Mac
Launch Vivid Walls from Spotlight or your Applications folder.
Press Cmd+Shift+P to open the Import from PC wizard. You can also find it in the File menu under "Import from PC." This is the same wizard you'll use any time you want to pull more wallpapers from your Windows machine later.
Step 3: Connect to your PC
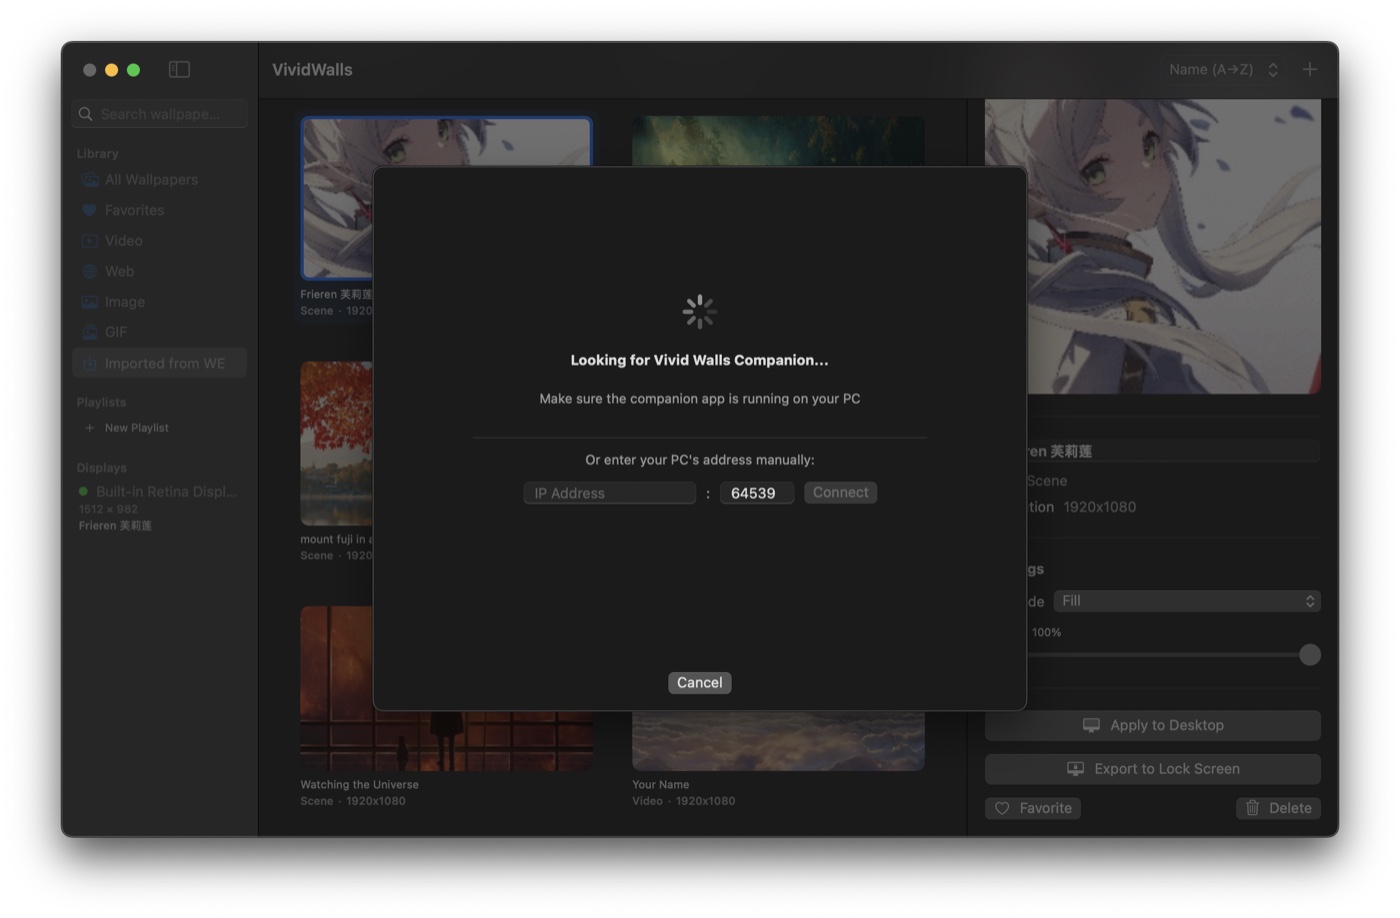
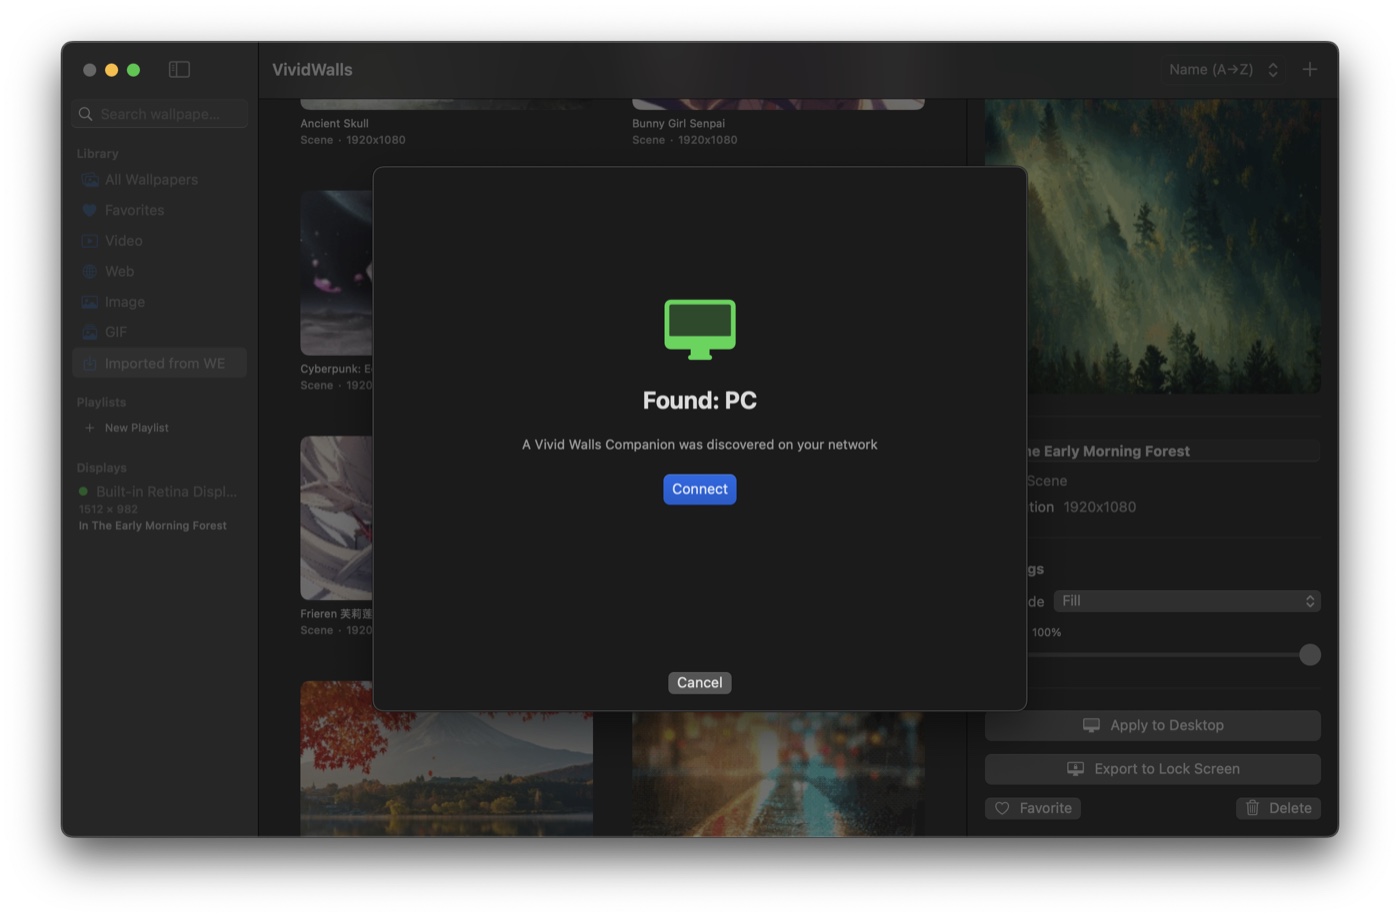
Your Mac uses Bonjour to discover the Companion on your local network. If both machines are connected and the Companion is running, your PC should appear in the list within a few seconds. Click Connect.
If nothing appears after about 30 seconds, jump to the troubleshooting section below. The most common cause is that the two computers are on different network segments.
Step 4: Enter the 4-character code
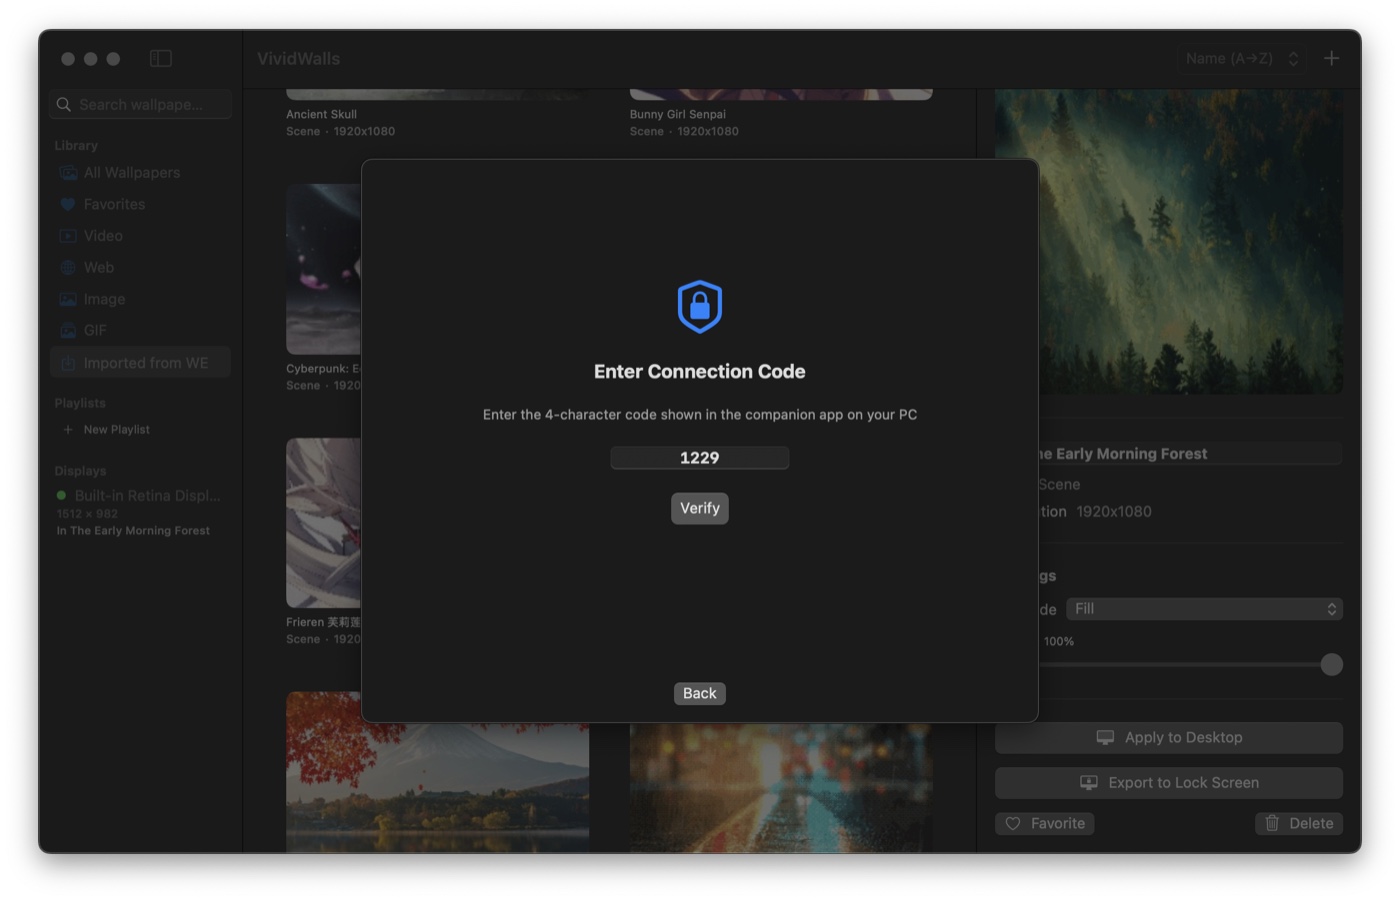
Type the 4-character code shown in the Companion window. This is a one-time handshake that confirms you're pairing with the right PC (useful if you're on a shared network and don't want to accidentally connect to a neighbor's machine). You do this once per import session; subsequent sessions generate a new code.
Step 5: Choose what to import
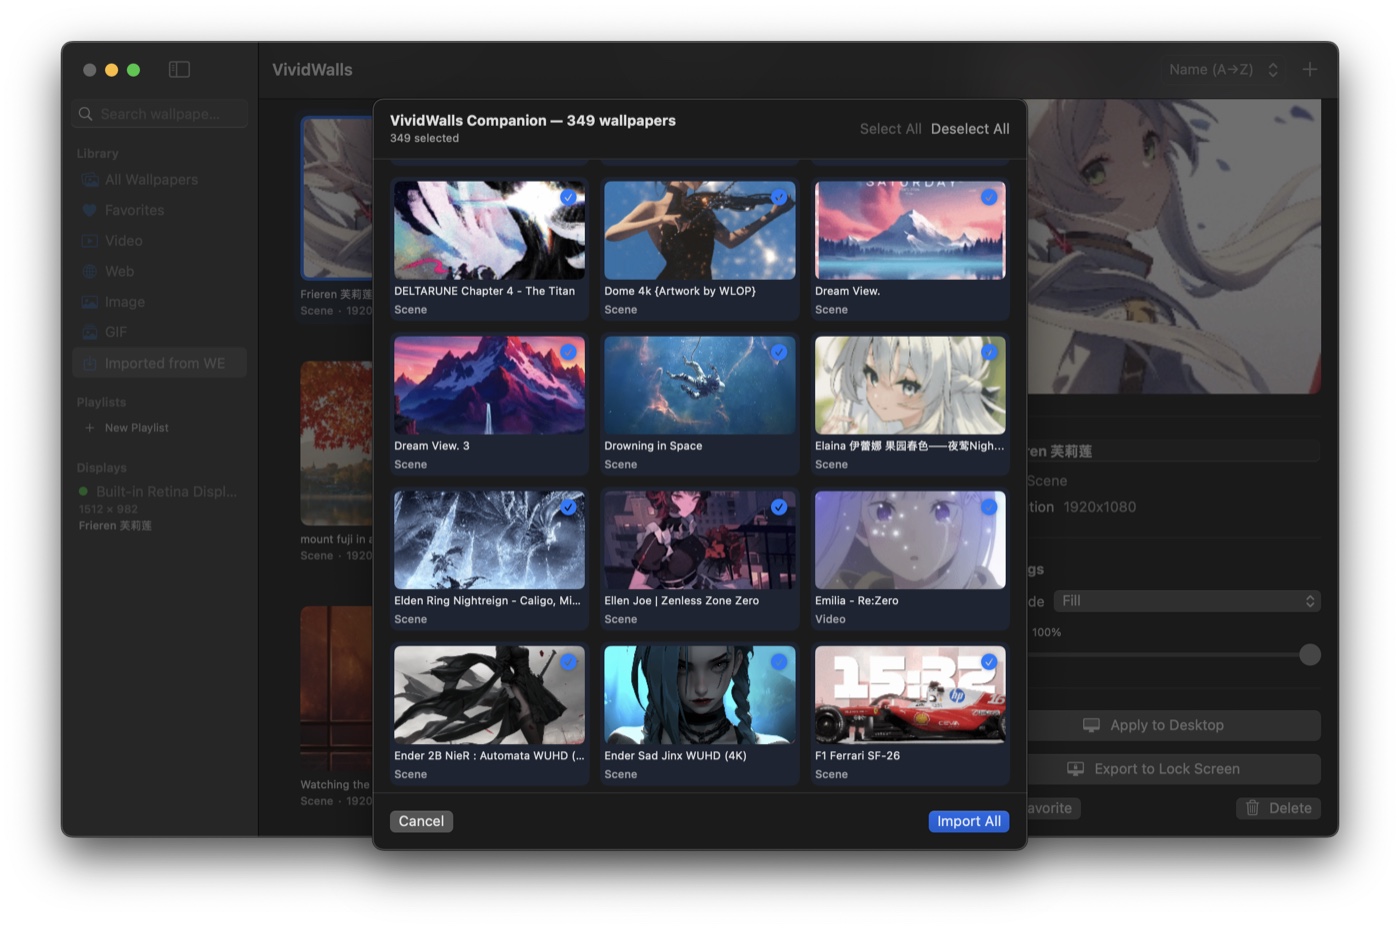
Once connected, Vivid Walls shows your complete Wallpaper Engine library from the PC: thumbnails, names, everything. Click Import All to grab everything, or scroll through and cherry-pick if you want to start with a subset.
When you've made your selection, click Import.
Step 6: Wait for the transfer
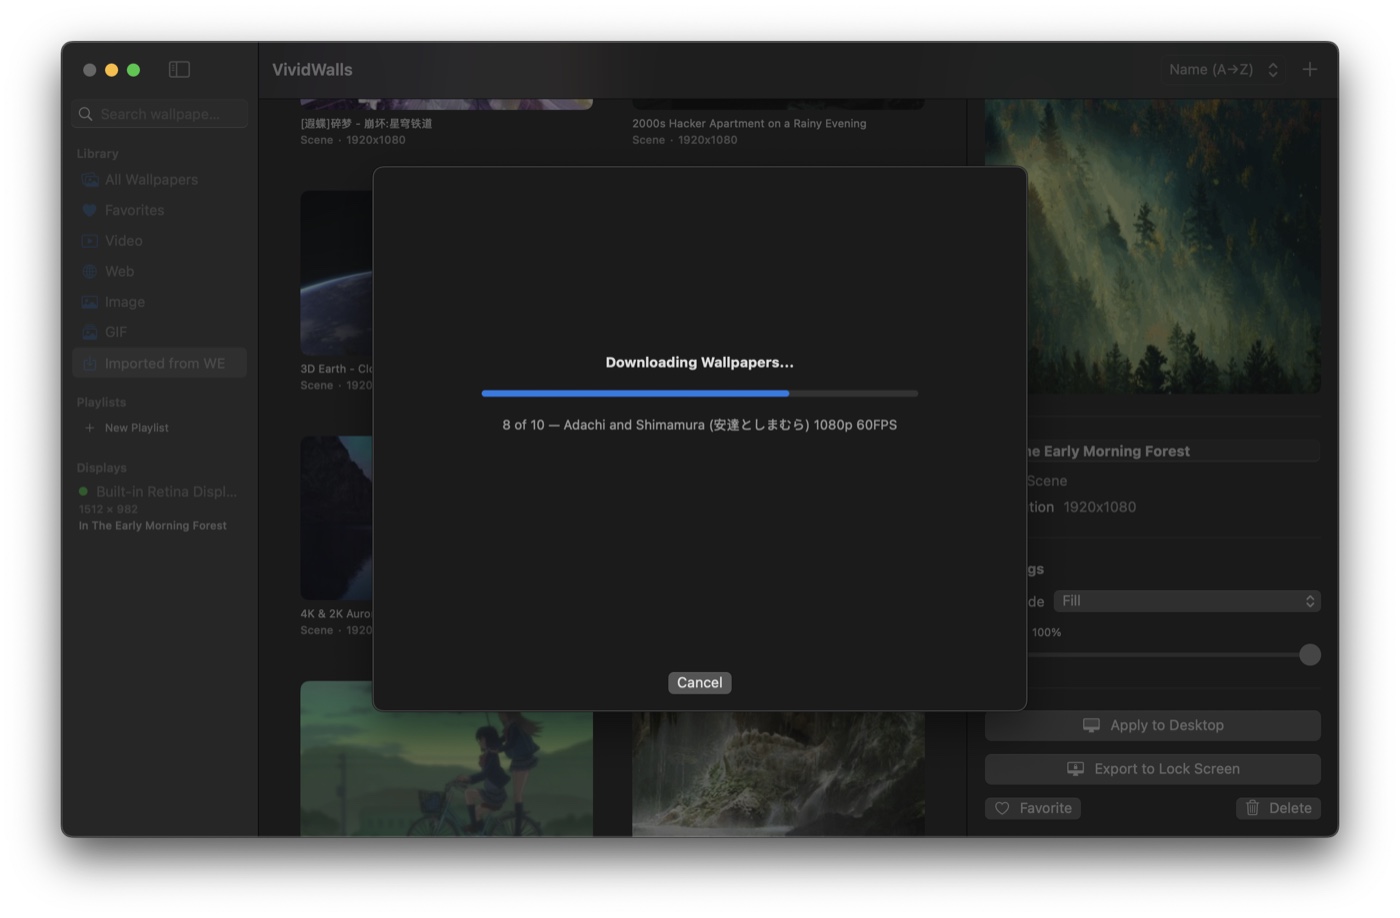
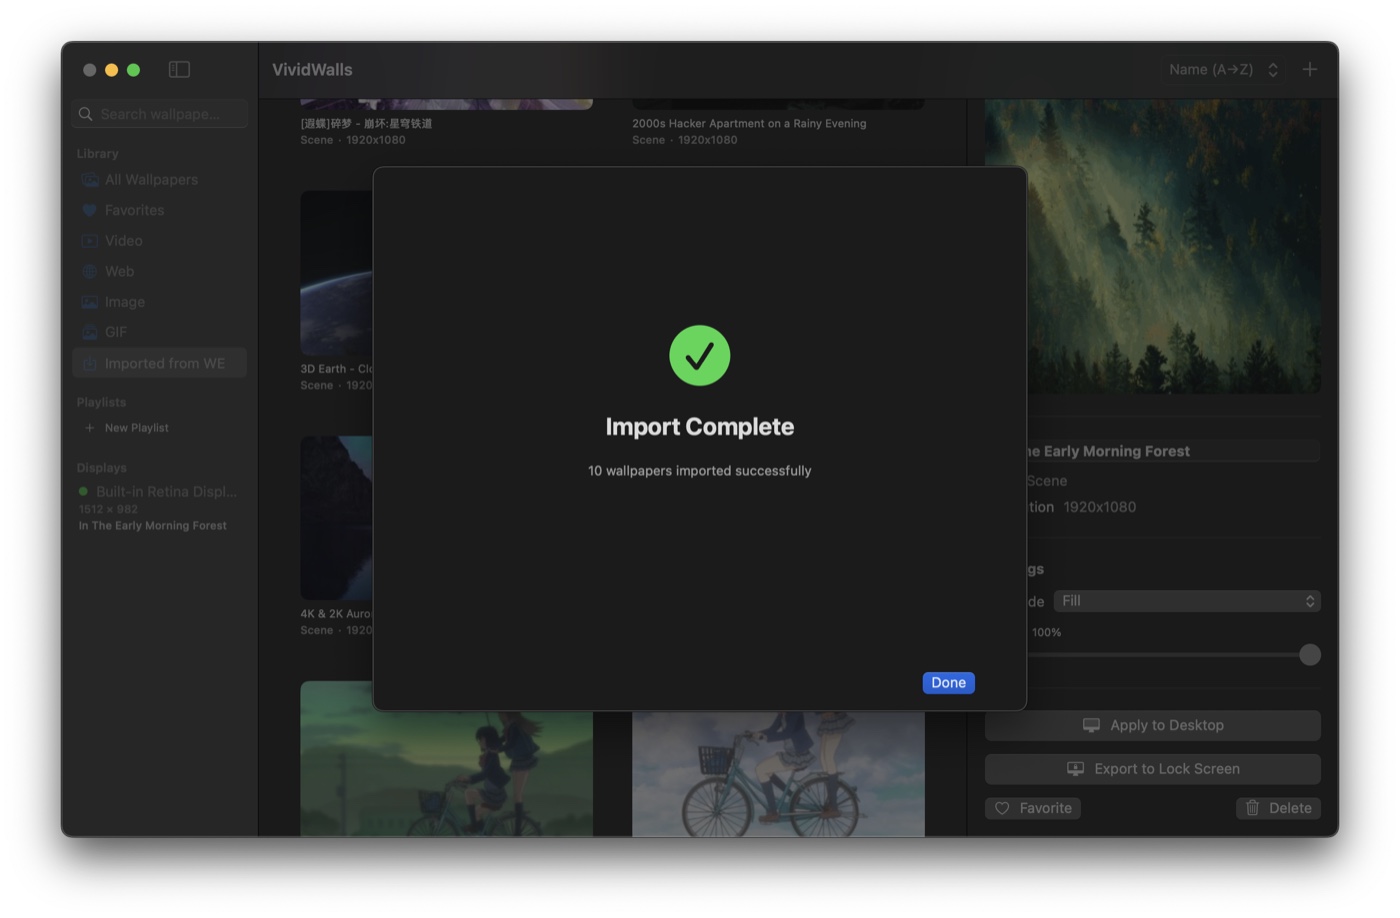
Transfer speed depends on your network and library size. Wallpapers appear in your Vivid Walls library as they arrive, so you can start browsing before everything finishes. Leave the Companion running on your PC until the transfer completes.
Step 7: Apply a wallpaper
Click any wallpaper in your library to select it. The right-side inspector shows per-scene controls: Fill Mode (how the scene scales to your display), Volume, Speed, and Opacity. These settings are saved per-wallpaper, so you can tune each one independently and they'll persist across reboots.
Click Apply to Desktop and the scene starts rendering on your desktop. That's it. Your library is running natively on your Mac.
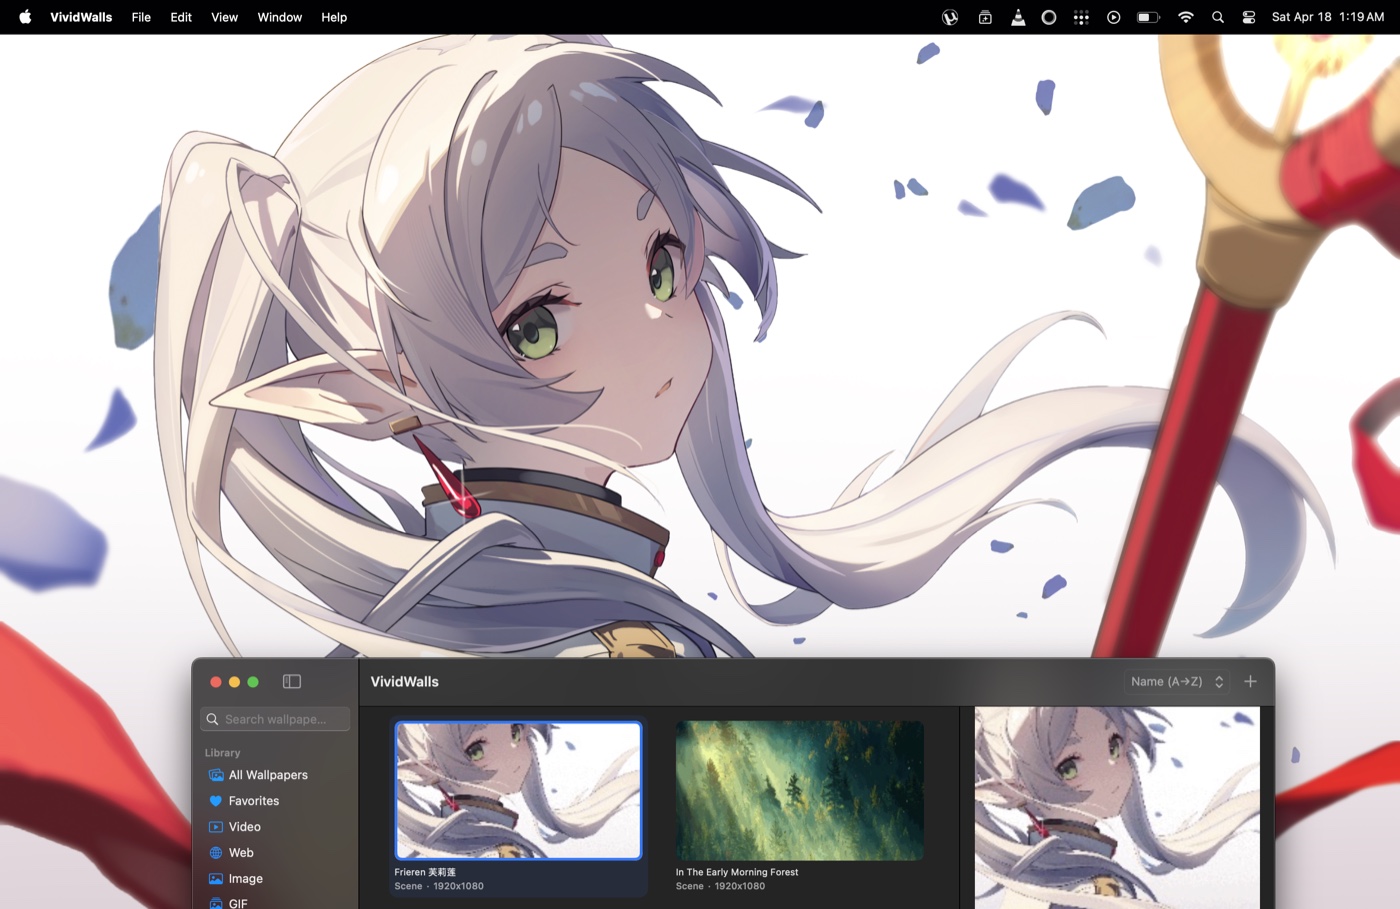
A screenshot cannot show the part that matters, which is that the scene keeps moving. This is the same thing recorded on a Mac, an imported Workshop scene rendering as the desktop wallpaper:
Why there is no Wallpaper Engine for Mac, and why that will not change
This is the question most people are really asking when they land here, so it is worth answering plainly rather than leaving you to hunt. Wallpaper Engine's developers have addressed macOS support directly, more than once, and the answer has been consistent for years. Their official help documentation states that "it's not economically viable for us to add support for Linux or Mac OS at this time," and on the Steam forums they have given the reasoning: Mac accounts for roughly 2 percent of Steam users, the same arithmetic that rules out Linux.
If that is the only thing you came here for, it has its own page, with the workarounds people try and what each one actually does on Apple Silicon: Does Wallpaper Engine work on Mac?
That is worth knowing before you spend an afternoon on workarounds. This is not a feature sitting in a backlog. It is a decision, restated over several years, and the numbers behind it have not moved. Running the scenes natively on macOS, which is what this guide walks through, is the durable answer rather than a stopgap until an official port arrives.
It is also worth knowing what is on the other side of that gap. Wallpaper Engine holds 231,463 Steam reviews at 97 percent positive and regularly runs between 54,000 and 113,000 concurrent users, which puts a wallpaper utility in the same concurrency range as a lot of shipping games. The Workshop attached to it passed 2,865,391 published items in August 2026. That library is the reason importing is worth the five minutes: no Mac app ships a built-in collection remotely that size, and none of them can reach this one.
Sources: Wallpaper Engine official help, Linux and macOS support, Steam Workshop item count, Wallpaper Engine on Steam. Figures checked 2026-08-20.
Troubleshooting
My Mac doesn't see the Companion
First, confirm both computers are on the same network segment. This can be an issue on mesh routers where 2.4 GHz and 5 GHz bands are treated as separate subnets, or when client isolation is enabled. The Companion uses Bonjour (local multicast), which doesn't cross subnet boundaries. Connecting both machines by Ethernet to the same switch usually resolves it immediately.
Also check that the Companion is still active on your PC. If it's no longer showing the pairing code, relaunch it to start a fresh session.
The Companion says no wallpapers found
Click Browse... and point the Companion at your wallpaper_engine folder manually. The typical path is [Steam library drive]\steamapps\common\wallpaper_engine. If you've moved your Steam library to an external drive or installed it outside the default Program Files location, you'll need to navigate there. Once you select the correct folder it rescans automatically.
A specific wallpaper doesn't render correctly
Vivid Walls handles the vast majority of Wallpaper Engine scenes correctly, but a small percentage use shader constructs or SceneScript features that aren't fully supported yet. If you hit one, open a support ticket or email support@vividwalls.app with the Steam Workshop link for that wallpaper. These get patched in subsequent releases and the turnaround is usually fast.
What you get once it's running
Every scene you transferred is rendering for real, not playing back a video loop. Per-scene settings (volume, speed, fill mode, opacity) save individually and persist across reboots. Vivid Walls can also drop to 15 FPS or pause entirely when your Mac is on battery, toggle it on in Settings → Performance. The scenes you imported render natively, the way their creators built them. How much of the wider Workshop renders correctly is not something anyone has measured at that scale, ours included, so treat your own library as the test: import it, see what runs, and send us the Workshop link for anything that does not. Those get fixed in later releases.
If you want to add more wallpapers from your PC later, just launch the Companion again and repeat the steps. The pairing code is fresh each session.
Common questions
Where does Wallpaper Engine store my wallpapers on a PC?
Wallpapers you subscribed to on the Steam Workshop live in steamapps\workshop\content\431960, one numbered folder per wallpaper. 431960 is Wallpaper Engine's Steam app ID. That is the workshop content folder, which is not the same as the Wallpaper Engine program folder at steamapps\common\wallpaper_engine, and the two get confused constantly.
The part people usually miss is that neither one is always on the C: drive. Steam records every library it uses in steamapps\libraryfolders.vdf, so if you moved your Steam library to a second drive your wallpapers are under that drive instead. The Companion reads that file and searches every library Steam knows about, so in practice you rarely have to go looking. Each numbered folder holds a project.json plus the scene's assets, which is why the whole folder has to travel together rather than a single file.
How do I move my Wallpaper Engine wallpapers to another computer?
To another Windows PC, copy the numbered folders out of steamapps\workshop\content\431960 onto an external drive or into a cloud folder, then put them in the same place on the new machine. Backing up and transferring a Wallpaper Engine library covers that route in full.
To a Mac there is no equivalent folder, because Wallpaper Engine has no Mac version. Run the Companion on the PC instead and it sends the folders straight across your local network using the steps above. Either way, copy whole numbered folders. A scene wallpaper is not a single file.
Do Steam and Wallpaper Engine have to be running while I transfer?
No. Neither has to be open. The Companion reads the wallpaper folders directly off the disk, so Wallpaper Engine only needs to be installed rather than running, and Steam can be closed. It does not sign in to Steam and it does not touch your Steam account.
Is the pairing code four digits?
It is four characters, and it can contain letters as well as numbers. The characters O, 0, I and 1 are deliberately left out so there is nothing ambiguous to mistype, and the field on the Mac uppercases what you type. A fresh code is generated every time you launch the Companion, so a code from an earlier session will not work.
My own wallpapers, the ones I made in the editor, did not show up. Why?
The Companion scans two locations: Steam's workshop content folder for 431960, and a projects\workshop folder inside your Wallpaper Engine install. Wallpapers you built yourself in Wallpaper Engine's editor are saved outside both of those, so they are not listed. Copy that wallpaper's folder into either scanned location and relaunch the Companion, and it will appear alongside the rest of your library.
Install Vivid Walls on the Mac App Store →
Questions or issues? Reach us at support@vividwalls.app. We read every message.